Bends
Here’s how to work with bends using the Soundslice editor.
Creating bends
1. Select the note you’d like to bend. (It doesn’t matter if you select it within the tablature staff or the standard-notation staff.)
2. In the editor’s top panel, open the “Tab” section and click the “Set bend” icon . Or search the editor for “Set bend.” Or use a keyboard shortcut.
3. You’ll see the “Edit bend” panel at left:
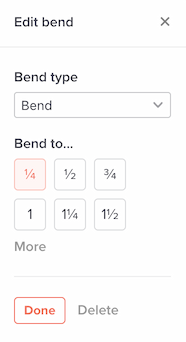
4. Select the type of bend. You have a variety of options:
- Bend
- Bend/release
- Prebend
- Prebend/bend
- Prebend/release
- Hold (only available for a tied note whose previous note has a bend set)
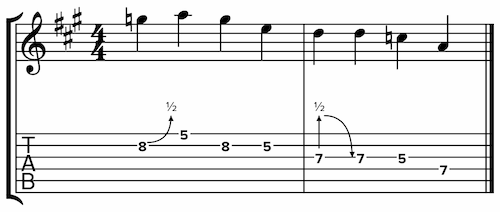
5. Depending on the type of bend you’ve selected, set the bend distance. These values are given in whole tones — so, for example, the value “1/2” is a semitone bend.
6. You’ll see your notation and tab update in real time, according to the bend info you’ve entered. Tweak as needed, then click “Done.”
Changing or removing bends
- Select the note. (It doesn’t matter if you select it within the tablature staff or the standard-notation staff.)
- You’ll see the bend icon in the current notations section. Click that icon to edit the bend.
- This will bring up the “Edit bend” panel. You can either make changes here or click “Delete” at bottom right.
What if I have a complex bend that goes up, then releases, then goes back up?
No problem. You can accomplish this by combining bends with tied notes. Create some tied notes, then edit each of the notes’ bend to piece together one mega-bend.
Can more than one note in a beat have its own bend?
Ah, gotta love the sound of double-stop bends. Sure. Just create a bend for each of those notes, one at a time.