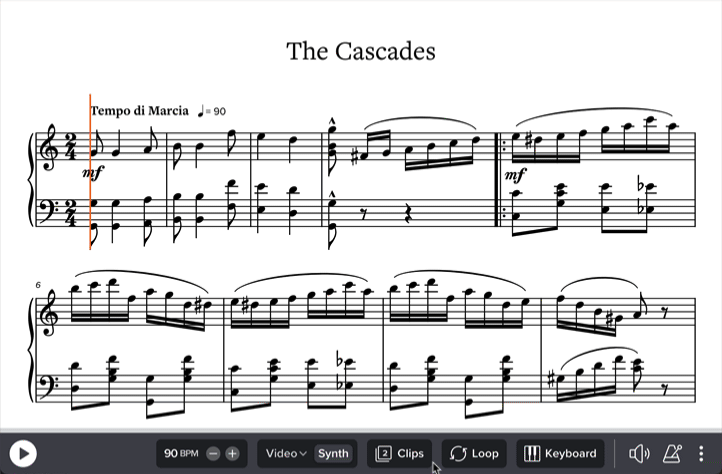
Clips
Our clips feature is a handy way to save specific subsections of music for easy access — essentially bookmarking “a slice of your slice.”
For example, you can create clips for:
- A structural part of the music, like the intro or chorus
- A two-bar phrase you struggle with
- A section you like to loop and practice over
- A specific passage you’d like to bring to your students’ attention, with suggested practice notes
You can save clips on any slice sitewide; these clips remain private to you. You can also add public clips on any slice you’ve created, and anybody viewing your slice will be able to use them.
Who can use clips?
You can create private clips on a slice if any of the following are true:
- You’re in a paid plan.
- You’re viewing a course you purchased from our store.
- You’re viewing a slice that’s been shared privately with you (e.g., by your teacher).
You can create public clips on a slice if you’re in a paid plan and you’re the slice creator.
Any user, paid or not, can view public clips.
Accessing clips
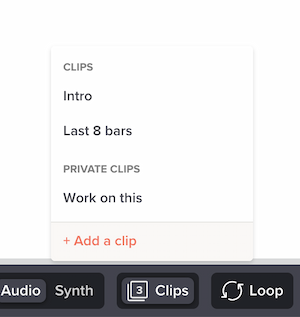
If a slice has any clips, you’ll see a Clips button at the bottom of the player:
Click any clip’s name, and you’ll instantly enter focus mode for that particular subset of music. Playback will automatically loop, and all other notation will magically be hidden — removing distraction and letting you focus on the subset of music. Nice!
You’ll see the clip’s name at the bottom of the screen (and an “Edit clip” button, if this is a clip you created):
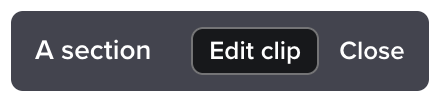
To exit the clip, hence returning to the full music, click “Close” in that panel.
Creating clips via the Clips button
To create a clip, make sure you’re logged in, then click the Clips button at the bottom of the screen.
If the slice doesn’t have any clips yet, it’ll look like this:
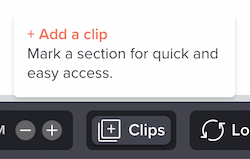
Otherwise, you’ll see “Add a clip” at the bottom of the list:

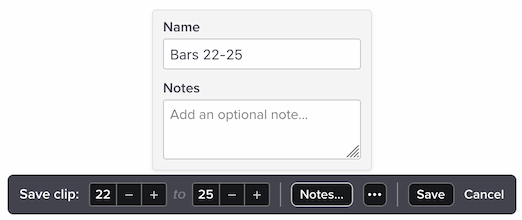
After you click “Add a clip,” a panel will appear at the bottom of your screen. Here’s where you specify the clip options:
At left is the bar range, which defines the section of music in your clip. Use the plus and minus buttons to increase or decrease it.
Click “Notes…” to rename your clip or add optional notes that’ll be displayed at the top of the screen when your clip is active:
Click the button to set various options for the clip:
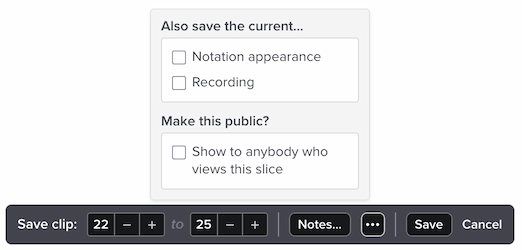
The options here are:
- Also save the current notation appearance — if you check this box, then the player will automatically restore notation appearance to whatever it was when this clip was saved. For example, you can use this to make a clip hide tablature, or only show lyrics. (See the Appearance section in Settings.)
- Also saving the current recording — if you check this box, then the player will automatically switch to the given recording when the clip is active. You’ll only see this option if the slice has at least two audio options (such as synthetic and a real recording).
- Make this public? — if you check this box, then anybody viewing your slice will have access to this clip. You’ll only see this option for slices you’ve created yourself; it’s not possible to add public clips to other people’s slices.
As soon as you hit Save, the clip will be ready for use.
Creating clips via a loop
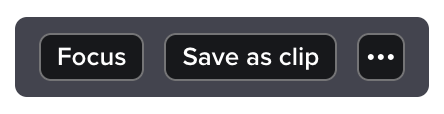
You can also create clips directly from a loop. Create a loop, then click “Save as clip” in the loop menu:
Creating clips via focus mode
You can also create clips from focus mode. If you’re in focus mode, click the “Save as clip” button in the bottom panel:

Changing existing clips
To change any of a clip’s information (its name, bars, etc.), first open the clip, then click the “Edit clip” button. You’ll see that panel again, and you’ll be able to make changes. Hit Save when you’re done, or Cancel to discard your changes.
Deleting clips
To delete a clip, first open the clip, then click the “Edit” button. You’ll see the panel to edit it. Click the icon.
Notationless clips
If you’re viewing a slice that has no notation — only audio/video — then clips work slightly differently.
To create a clip in a notationless slice, make sure the waveform is active (you can activate it in the player settings menu). Then create a loop by dragging over the waveform, and hit “Save” to open the “Save clip” panel.
There are a few limitations for this type of clip:
- We don’t support setting notes on the clip.
- When opening the clip, instead of opening focus mode, we merely open a loop.
- The clip is “tied” to a specific recording. If the slice has multiple recordings and your currently selected recording is different than the clip’s recording, activating the clip will change the currently selected recording.
Is there a limit on how small or large a clip can be?
Clips must always begin and end on barlines. Aside from that, there’s no limit on their size. Effectively that means the minimum size is one bar, and the maximum size is the full length of the slice.
For notationless clips, since these slices have no concept of barlines, there’s no limitation on the size of the clip.
If I make a clip public, who can see it?
The clip will appear in the Clips menu for anybody viewing that slice. They don’t even have to be logged in. See slice privacy settings for the various sharing options for slices in general.
What happens if I change a public clip to private?
It’ll no longer be available to other people viewing your slice. It’ll only be accessible to you.
What happens to my clips if I downgrade from a paid plan to the free plan?
All your clips will remain, and you’ll still be able to use them. You just won’t be able to edit them or add new ones.
Do clips work with Soundslice embeds?
Yes! Clips are supported in embeds. If one of your slices has public clips, and you embed that slice, then the clips will be available in the embed. Anybody viewing your embed will be able to use the clips interface to select the clips you’ve added.
Please note that our embed treats clips as read-only. In other words, people viewing your slice via an embed cannot directly add their own clips to the slice. The only way to add clips to a slice is via soundslice.com directly (not via embeds).
What should I use the “Notes” field for?
That’s really up to you. If you’re using Soundslice to teach, you could leave some practice suggestions in there. If you’re using the clips privately, you could use it as a way to leave reminders for yourself (but perhaps our private notes feature would be better for that).