Adding/removing clefs
Here’s how to add and remove clefs using the Soundslice editor.
Setting an initial clef
When you add an instrument, you can specify the instrument’s initial clef in the “Add instrument” screen.
Changing a clef at a barline
The easiest way to change a clef is to click the clef directly in your notation.
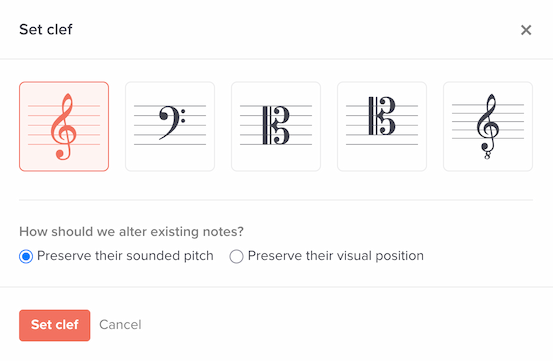
This will bring up the “Set clef” screen. Select one of the clefs to make the change:
If you want to change the clef for a bar in the middle of a staff (where there’s no existing clef to click), select any of the notes or rests in that bar, then:
- In editor’s top panel, open the “Bar” section and click the clef icon .
- Or: Search the editor for “Change clef.”
Adding an inner-bar clef change
To change the clef in the middle of a bar, follow these steps:
- Select the first note that would be affected by the clef change.
- In editor’s top panel, open the “Bar” section and click the clef icon , or search the editor for “Change clef.”
- You’ll see the “Set clef” screen. Choose your clef.
Removing an inner-bar clef change
If you no longer want an inner-bar clef change:
- Click the clef (the one that starts the inner-bar clef change).
- You’ll see the “Edit clef” screen. Choose the clef active at the start of the bar.
- Our system will work out that the clef change is no longer necessary, so it will automatically be removed.
Changing a clef for a range of music
In certain situations, you might want to change the clef for just a specific range of music. Here, for example, we change to a bass clef just for four notes:
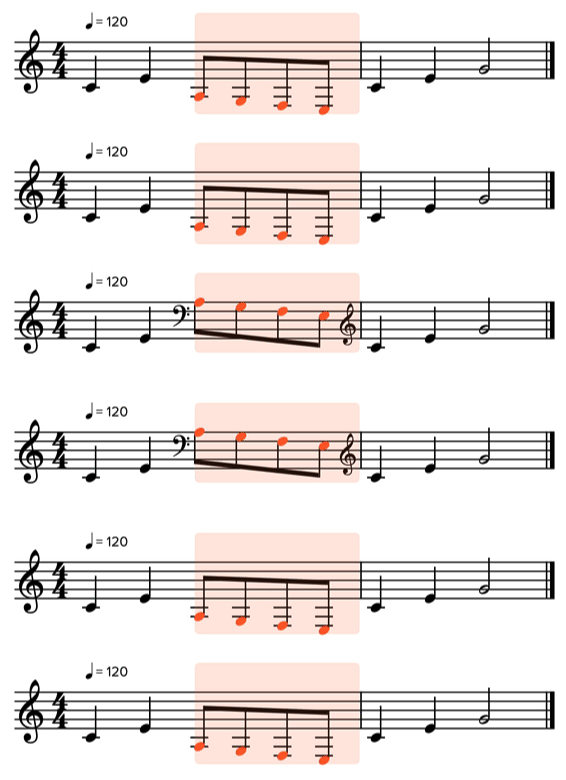
To do this, you can simply select multiple notes before opening the clef tool.
The “Set clef” tool works like this:
- If your selection is just a single note, the clef will be changed until the next clef change (or the end of the music, if there are no subsequent clef changes).
- If your selection is multiple notes, the clef will be changed only for the selection.
Altering existing notes
In the clef screen, you’ll see a “How should we alter existing notes?” section. Here are the options:
- Preserve their sounded pitch — after the clef change, the notes will sound the same, and their vertical position on the staff will be updated to reflect the new clef. This is the default behavior and likely what you want.
- Preserve their visual position — after the clef change, the notes’ vertical position on the staff will be the same, and their sounded pitches will be updated to reflect the new clef. This is mainly useful when cleaning up scanned music that missed a clef detection.
Do I need to worry about adding cautionary clefs at the end of a system?
No! Soundslice will add these automatically, depending on how your notation is layed out on a particular device.
What about percussion clefs?
Percussion clefs are special, just like percussionists themselves are special.
If you have music that uses a treble, bass or C clef, and you want to change it to use a percussion clef, use the separate “Convert to percussion” feature. See “Converting a non-percussion instrument into percussion” on this page for details.
If you’re starting from scratch: when you create an instrument that’s a percussion instrument, or import music that uses percussion, we’ll use a percussion clef automatically.