Fingerings
Here’s how to edit fingerings using the Soundslice editor.
Note that our system has two separate concepts: fingering and right-hand fingering. The difference:
- Fingering is general-purpose fingering, where “1” means your first finger. Use this for piano music, for example.
- Right-hand fingering is used for instruments such as classical guitar. This uses abbreviations such as p, m or a, and the fingering is rendered in italics.
Entering fingerings
- Select the note whose fingering you want to set.
- In the editor’s top panel, open the “Performance” section and click the “Set fingering” button . Or search the editor for “Set fingering” or use a keyboard shortcut.
- At the left of your screen, you’ll see a place for you to enter the fingering number. Enter the number here, then click “Done.”
Quick fingering entry
While the fingering entry interface is open at left, you can hit the spacebar to select the subsequent note. This makes it fast and easy to enter fingerings: enter a number, then hit spacebar, then enter a number for the next note, etc. Here’s what that looks like:
Changing fingerings
- Click the fingering number directly in your notation.
- At the left of your screen, you’ll see a place for you to edit that fingering number. Edit a number here, then click “Done.”
Deleting fingerings
To delete a given fingering, click on it in your notation to make the fingering interface appear at left. Then just delete the number and click “Done.”
Right-hand fingering
Right-hand fingering works the same way as “normal” fingering. There’s a separate button called “Set right-hand fingering” next to “Set fingering” in the top panel’s “Performance” section.
Fingering features
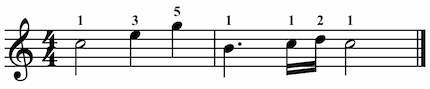
If you take the time to enter fingering information, Soundslice does some nice things with it. In addition to (obviously) showing fingering in the notation, our player will:
- Display the fingering over the appropriate key in the visual keyboard.
- Allow people to toggle fingering display on and off via the Instrument appearance options.
- Hide the fingering in the notation if the person viewing your slice has transposed the music.
- Likely do some more exciting things in the future.
Positioning
By default, our engine will position fingerings automatically — either above, below, left or right of the notes. Our automatic positioning is determined by various factors:
- Whether the bar has multiple voices
- Whether the note is within the staff lines or on ledger lines
- Whether the note is in a grand staff
- Whether the note starts or ends a tie
- How many notes in a given chord have a fingering set
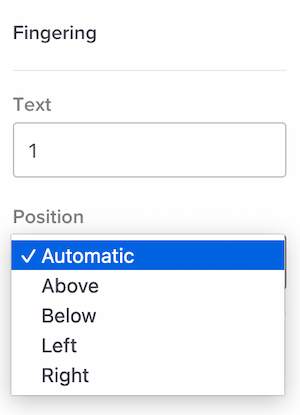
If you don’t like a note’s automatic positioning, you can manually specify the position in our editor. When editing the fingering, change the position to “Above,” “Below,” “Left” or “Right” as seen here:
To change fingering position for multiple notes at the same time:
- Select all of the notes.
- Use the editor search to find the “Set fingering position to above” or “Set fingering position to below” command, then click that.
Color
There’s no way yet to change a given fingering’s color in our editor. But if you import a notation file that has colored fingerings, we’ll use those custom colors.
Note: Fingering colors will only be imported for users in a paid plan.
Controlling typography
It’s not currently possible to change the font we use in fingering, but we’ll eventually support this.
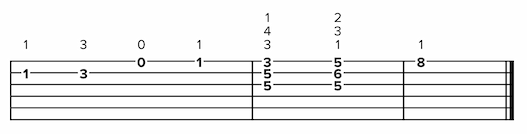
Fingering in tab-only view
If your music contains tablature and you’ve hidden the standard notation, we’ll display the fingering above the tab staff, like so: