Creating a Mux recording
Here’s how to create a recording using a Mux video. This type of recording is intended for people who use Mux for video hosting.
This feature is limited to people in the Teacher or Licensing plans.
Giving Soundslice access to your Mux account
Before you can create recordings with your Mux videos, you’ll need to give Soundslice permission to access your Mux account.
First, log into your Mux account and go to your account settings. In “Access Tokens,” create a new token. The only permission we need is Mux Video -> Read.
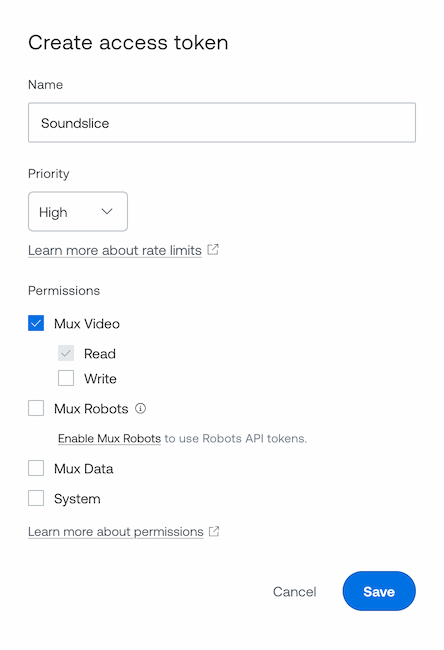
Mux will give you a “Token ID” and “Secret Key.” Copy those values to your computer.
Then, in your Mux settings, go to the “Signing Keys” area and click “Generate key.” Mux will give you a “Key ID” and “Secret Key.” Copy those values to your computer.
Back at Soundslice, go to this page and enter the four values from Mux.
We need these permissions in order to access your videos. We will only ever use it in a read-only way — we never change data in your Mux account.
Creating the recording
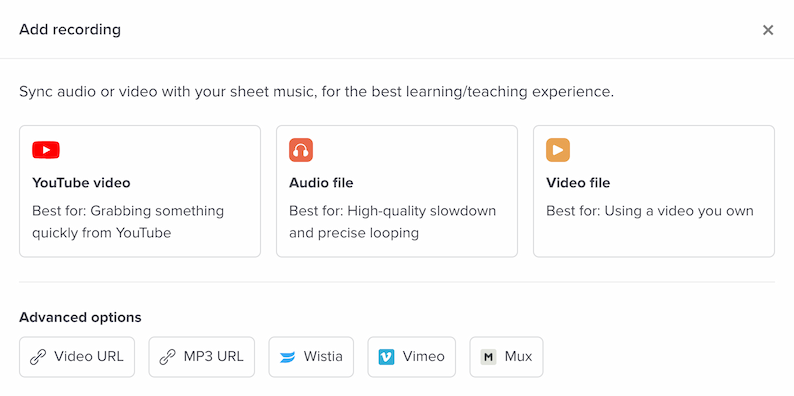
1. After creating your slice, add a recording. Click “Mux” on this screen:
2. Click “Add recording” and you’ll be taken to a page where you can view the videos in your Mux account, including their thumbnails.
3. Click the video you’d like to use, or enter its video ID directly.
4. Click “Save,” and you’ll be done. Now it’s ready to sync.
What happens if I delete my video from within Mux?
Soundslice will not automatically remove your associated recording. It’s up to you to manage it within our system.
How can I change an existing Mux recording to use a different Mux video?
It’s not possible to switch a Mux video within a Soundslice recording at the moment, so you need to do a small workaround:
- Create a new (second) recording within your slice, using your new Mux video.
- Copy the syncpoints from your first recording to the new one.
- Delete the first recording.